Cleaning Tarnished Silver

How to Clean Tarnished Silver
Silver is beautiful when it’s polished, but it doesn’t take long for that dull, yellowish or dark appearance to start showing up. Whether it’s silver jewelry, flatware, serving pieces, or decorative items, tarnish is something most silver owners eventually deal with.
The good news is that you don’t always need an expensive silver cleaner to bring back the shine. Several household ingredients, including baking soda, washing soda, and even aluminum foil, can help remove tarnish. Other methods, such as vinegar and toothpaste, are commonly suggested but need a little more consideration before using them.
The trick is knowing which cleaning method works best for the type of silver you’re cleaning.
What Causes Silver to Tarnish?
Silver tarnishes when it reacts with sulfur-containing compounds in the environment. This reaction creates silver sulfide, which forms a yellowish, brown, gray, or black layer on the surface.
Humidity, air pollution, certain foods, and even materials used for storage can contribute to tarnishing.
And here’s something worth knowing: tarnish isn’t the same as ordinary dirt. Washing silver with dish soap may remove grease and fingerprints, but it won’t necessarily remove that dark layer.
That’s why there are different methods for cleaning and polishing silver.
Cleaning Tarnished Silver with Aluminum Foil
This is one of the more interesting homemade silver-cleaning methods because it uses a chemical reaction rather than relying on scrubbing.
When silver comes into contact with aluminum foil in a suitable hot alkaline solution, an electrochemical reaction can help convert silver sulfide back into silver.
What You’ll Need
- Aluminum foil
- 1 tablespoon of washing soda (sodium carbonate)
- 1 quart of hot water
- A glass or heat-safe container
- A soft towel
How to Remove Tarnish
- Line the bottom of your container with aluminum foil.
- Add the hot water and dissolve the washing soda.
- Place your silver in the solution, making sure it touches the aluminum foil.
- Watch as the tarnish begins to change. Check frequently rather than leaving the silver soaking.
- Remove the silver carefully, rinse thoroughly, and dry immediately with a soft cloth.
For heavily tarnished pieces, you may need another short treatment.
A few precautions: This method is best reserved for uncomplicated, solid silver pieces that can safely be immersed. Avoid using it on antique silver, intentionally oxidized designs, jewelry with gemstones, glued decorations, hollow handles, or silver-plated pieces of uncertain condition.
The reaction can also leave silver looking somewhat dull rather than highly polished. A suitable silver-polishing cloth can help restore the shine.
Can You Use Baking Soda?
Yes, baking soda is commonly used in homemade silver-cleaning recipes, although how you use it makes a difference.
Baking soda, or sodium bicarbonate, is not the same ingredient as washing soda. Both can be used in aluminum-foil cleaning methods, but the solution strength and effectiveness can differ.
Baking Soda and Aluminum Foil
For a household baking soda version, you can try the following on a plain, inexpensive silver item:
- 1 tablespoon of baking soda
- 1 quart of hot water
- Aluminum foil
- A heat-safe container
Line the container with foil, dissolve the baking soda in the water, and place the silver against the aluminum.
Check the silver frequently, then rinse and dry thoroughly.
This method may work more slowly than washing soda, depending on the amount of tarnish.
What About Baking Soda Paste?
You’ve probably seen recipes recommending a thick paste of baking soda and water.
Although rubbing the paste can remove tarnish, baking soda particles are abrasive. That means you’re physically polishing away surface material, and repeated use can leave fine scratches.
I wouldn’t choose this method for valuable silver, silver plating, or pieces with delicate finishes.
For everyday household silver, a purpose-made polishing cloth is generally a better option when you need to remove tarnish by rubbing.
Cleaning Silver with Vinegar
Vinegar is another household ingredient frequently mentioned in silver-cleaning recipes.
Because vinegar contains acetic acid, it can dissolve certain mineral deposits and react with some surface contaminants. However, it isn’t especially effective at removing silver sulfide tarnish by itself.
You may have seen recipes that combine white vinegar with baking soda or salt.
Here’s where I’d be careful.
Mixing vinegar and baking soda creates fizzing as the acid and base react, but the fizz itself doesn’t mean the mixture is removing silver tarnish. Much of the acidity and alkalinity can neutralize each other.
Adding salt introduces another concern because chloride-containing solutions can contribute to corrosion problems, particularly when silver contains copper or has damaged plating.
For that reason, I wouldn’t recommend vinegar-and-salt soaking as a routine silver-cleaning method.
Where vinegar may be useful: Removing certain mineral deposits from a compatible, nonvaluable item, provided the entire object can tolerate mild acid. That is different from removing tarnish, and I’d avoid it on antiques, plated pieces, and mixed-material jewelry.
Can Toothpaste Polish Silver?
Toothpaste has been used as a homemade silver polish for years, and there’s a reason people sometimes see results.
Many toothpastes contain mild abrasives designed to polish teeth. Those same particles can physically remove some tarnish from silver.
But there’s a catch.
Toothpaste formulations vary considerably. Some contain relatively abrasive polishing particles, whitening ingredients, or other additives that aren’t intended for precious metals.
Even if the silver looks shinier afterward, you may also be creating tiny surface scratches.
For that reason, I wouldn’t recommend toothpaste as a regular silver-cleaning method, particularly on sterling jewelry, antiques, or silver-plated items.
A proper silver-polishing cloth gives you more control.
How to Make Homemade Silver Polish
If you’d rather polish silver than soak it, there’s another option worth discussing: precipitated calcium carbonate.
Also known as precipitated chalk, this finely prepared powder has been used in conservation work for polishing certain silver objects.
The important word here is precipitated. Ordinary chalk or coarse calcium carbonate powder isn’t necessarily suitable.
What You’ll Need
- Fine precipitated calcium carbonate suitable for silver polishing
- A little water
- A soft cotton cloth or pad
- A clean, soft towel
How to Use the Silver Polish
- Mix a small amount of powder with enough water to make a smooth paste.
- Test a small, inconspicuous area first.
- Gently apply the paste using a soft cotton cloth.
- Work carefully over the tarnished area without aggressive rubbing.
- Remove the residue completely with a damp cloth or clean water, if the item can safely get wet.
- Dry thoroughly, paying attention to decorative details.
Although this is a relatively gentle polishing option when the correct materials and technique are used, it’s still abrasive polishing. I wouldn’t use it indiscriminately on antiques, delicate silver plating, or valuable pieces.
What About Using Ammonia?
Ammonia appears in quite a few older household silver-cleaning recipes.
It can help remove certain greasy residues and contaminants, but it isn’t a universally suitable tarnish remover.
One complication is that sterling silver contains copper, and silver objects may also have soldered joints, plating, decorative finishes, or other materials that react differently to ammonia solutions.
For those reasons, I wouldn’t recommend an improvised ammonia soak for mixed-material jewelry, antiques, or silver pieces of uncertain construction.
If an item requires more than ordinary cleaning, an appropriate silver cleaner or professional treatment is a better choice than experimenting with ammonia concentrations.
And, of course, never mix ammonia with bleach or other household cleaning products.
Cleaning Silver with Dish Soap
Now, dish soap does have its place!
If your silver is covered in fingerprints, food residue, grease, or everyday dirt, a little mild dish soap and warm water can clean the surface before polishing.
How to Clean It Using Dish Soap
- Add a few drops of mild dish soap to warm water.
- Gently wash the silver with a soft cloth.
- Rinse thoroughly.
- Dry immediately with a clean towel.
Just remember that this is primarily a cleaning method, not a tarnish-removal treatment.
Avoid immersing items with hollow handles, glued decorations, wood, or materials that shouldn’t get wet.
How to Clean Different Silver Items
Not all silver is made the same way. A method that works on a plain sterling silver spoon might be completely unsuitable for a necklace with pearls or an antique silver-plated tray.
Silver Flatware
For everyday care, handwash silver flatware after use and dry it immediately.
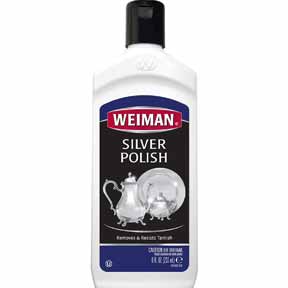
When tarnish develops, a suitable silver-polishing cloth or polish made for the type of silver is often a practical choice.
Plain, uncomplicated sterling silver flatware may be suitable for the aluminum-foil method, but avoid immersing knives with hollow or cement-filled handles.
Silver Coffee and Teapots
Silver coffee and teapots can be tricky because they may contain hollow handles, wooden components, soldered joints, and decorative details.
Clean the exterior with a soft, slightly damp cloth when appropriate, and use a suitable silver polish on tarnished areas.
Avoid soaking the entire pot, especially if liquid could enter the handle or other enclosed spaces.
For the interior, use only cleaning products appropriate for food-contact surfaces and rinse thoroughly.
Silver Jewelry
Plain sterling silver chains, rings, and bracelets without gemstones or glued components may be suitable for gentle washing and careful tarnish removal.
But jewelry containing pearls, opals, turquoise, porous stones, or glued settings needs a different approach.
Be particularly careful with intentionally blackened or oxidized silver jewelry. Removing that dark finish can change the appearance of the design.
For jewelry with stones, choose a cleaning method that’s safe for the entire piece.
Silver-Plated Items
Silver-plated objects have a relatively thin layer of silver over another metal.
Repeated abrasive polishing can gradually wear through that layer, exposing the metal underneath.
Use the least aggressive method that works, avoid unnecessary scrubbing, and be especially cautious with homemade chemical treatments.
Removing Sticky Labels from Silver
Ever bought a silver item with a price sticker that leaves a sticky mess behind?
Start by carefully peeling away the label with your fingers. You can try softening ordinary water-soluble adhesive residue with a slightly damp cloth and a little mild dish soap.
For stubborn adhesive, a compatible adhesive remover may work, but check the manufacturer’s instructions and test a hidden area first.
Avoid scraping with metal tools or using strong solvents on lacquered, antique, or decorated silver.
How to Keep Silver from Tarnishing
You can’t completely prevent silver from tarnishing, but proper storage can slow the process considerably.
- Keep silver dry. Moisture can accelerate surface reactions and contribute to staining.
- Use tarnish-resistant storage materials. Special silver storage cloths or bags can help limit exposure to tarnishing substances.
- Avoid rubber and certain plastics. Some materials release sulfur-containing compounds that encourage tarnishing.
- Store pieces separately. This helps prevent scratches.
- Remove food residue promptly. Eggs, salt, and certain other foods can contribute to staining.
- Handle silver with clean hands. Fingerprints can leave oils and moisture behind.
- Avoid unnecessary polishing. Every abrasive polishing treatment removes at least a small amount of material.
For silver that’s used only occasionally, good storage may make a bigger difference than frequent cleaning.
Frequently Asked Questions
What Is the Best Homemade Silver Cleaner?
For plain, uncomplicated silver with tarnish, the aluminum foil and washing soda method is one household option. For light tarnish, a suitable silver-polishing cloth may be easier.
The best choice depends on whether the piece is solid silver, silver-plated, antique, or decorated with other materials.
Does Baking Soda Remove Silver Tarnish?
Baking soda can be used with aluminum foil and hot water to help remove tarnish. Rubbing baking soda directly onto silver can also remove tarnish through abrasion, but it may scratch the surface.
Can Vinegar Remove Tarnish?
Vinegar may remove certain deposits, but it isn’t a reliable general-purpose treatment for silver sulfide tarnish. Vinegar-and-salt mixtures are particularly unsuitable for some silver items.
Is Toothpaste Safe for Silver?
Toothpaste can sometimes polish silver because of its abrasive ingredients, but those particles may scratch the metal. A silver-polishing cloth is generally a more predictable choice.
Can You Clean Silver-Plated Items Like Sterling Silver?
Not always. Silver plating is thin and can wear away with repeated polishing. Gentle, material-appropriate cleaning is particularly important.
How Often Should You Polish Silver?
Only when necessary. Frequent polishing can gradually wear down silver surfaces, especially on plated pieces.
Cleaning Tarnished Silver
There are several ways to clean tarnished silver, and they don’t all involve buying a specialty cleaner.
Aluminum foil with washing soda or baking soda can help remove tarnish from certain uncomplicated silver pieces, while carefully selected polishing products can restore shine when rubbing is needed. Other familiar household ingredients, including vinegar, toothpaste, and ammonia, have limitations that are worth understanding before using them.
The important thing is knowing what you’re trying to remove. Dirt, grease, mineral deposits, and silver tarnish aren’t the same thing, and they don’t always respond to the same cleaning methods.
With the right approach, you can keep silver looking beautiful without unnecessarily damaging the finish.
Household Cleaners


Follow Us on Facebook