How to Clean and Remove Mineral Deposits

How to Remove Mineral Deposits Using White Vinegar.
How to Clean Mineral Deposits Using White Vinegar
If you have hard water, then you know full well how the minerals in your tap water can build up and stain your sinks, glass, tub and shower, not to mention the toilet. No matter what you do, it seems as if those stains are there to stay – so how to clean and remove mineral deposits is a good thing to know.
While regular soap and water (and even many bathroom cleaners) can’t even come close to combating these hard water stains, there are ways to handle cleaning mineral deposits in your bathroom and kitchen, leaving your house looking brand new once again.
Avoid Harsh Products That Can Dull and Scratch Surfaces
Many kitchen and bath cleaners claim to clear away mineral deposits left in sinks and toilet bowls, and yes, many can. Made from acid-based chemicals, these cleaners can get the job done. But at a price.
Abrasives and harsh chemicals scour off stains, but leave scratches and dullness behind. Even bleach can leave a surface looking bland and dull after repeated use.
A Natural Approach to Cleaning Mineral Deposits
Cleaning mineral deposits in your home does not have to mean destroying your appliances and fixtures.
There are natural and milder acids that can get the job done with no negative effects. One solution is to try using white vinegar. It’s a mild acidic and can help on things like chrome faucets, shower heads, shower doors, inside the dishwasher, the washing machine, toilet bowl, coffee makers, sinks and tubs and more.
How to Clean and Remove Mineral Deposits from the Coffee Maker
How to clean and remove mineral deposits from a coffee maker is pretty simple. Here’s how:
- Fill the tank or reservoir with a 50/50 mix of white vinegar and water.
- Run a brewing cycle and let the vinegar mixture run through the coffee maker. You can repeat this step if the coffee maker is really dirty.
- Rinse with water by running a few cycles of plain water to thoroughly rinse out any remaining vinegar.
If you have a Keurig coffee maker, keep running a full cup until reservoir is empty then run a couple more through with plain water.
Removing Mineral Deposits from the Shower Head
Remove the showerhead and submerge it completely in warm vinegar. You can heat the vinegar on the stove before soaking the showerhead, which will shorten the soaking time (though it will increase the vinegar smell). This step is optional.
Whether you warm the vinegar or not, let the showerhead soak for several hours or overnight. After soaking, scrub the showerhead with an old toothbrush, rinse with water, and reinstall.
Cleaning Mineral Deposits from a Chrome Faucet
Cleaning mineral deposits from a chrome faucet is simple with a few household items. Here’s how you can do it:
Gather Your Supplies
- Distilled white vinegar
- A soft cloth or paper towels
- A plastic bag (if the deposits are around the base or spout)
- An old toothbrush
- Water for rinsing
Soak the Affected Areas
- If the deposits are on the faucet handles or spout, soak a cloth or paper towel in vinegar and wrap it around the affected area.
Scrub Gently
- After soaking, remove the cloth and use an old toothbrush to gently scrub away the loosened deposits. Be careful not to scratch the chrome surface.
Rinse and Dry
- Rinse the faucet thoroughly with water to remove any vinegar residue.
- Dry the faucet with a soft cloth to prevent water spots and keep it shiny.
By following these steps, your chrome faucet will be free of mineral deposits and look as good as new.
Removing Mineral Deposits from the Dishwasher
Vinegar is a natural odor neutralizer that helps to dissolve grit, grime, and buildup in your dishwasher while also eliminating lingering smells. Use this method with an empty cycle. Here’s a simple way to use it:
- Prepare the Vinegar: Fill a cup, bowl, or mug about two-thirds full with white vinegar.
- Position the Cup: It’s important to place the cup or bowl securely in the top rack of the dishwasher, making sure it’s upright.
- Run a Hot Cycle: Run your dishwasher on the hottest setting with no dishes inside.
- Optional Scent: If you don’t like the smell of vinegar, add a few drops of essential oil (like citrus or peppermint) to the vinegar before starting the cycle.
Cleaning Mineral Deposits from the Washing Machine
To clean mineral deposits from your washing machine, follow these steps:
Prepare the Vinegar
- Measure 1 to 2 cups of distilled white vinegar.
Add Vinegar to the Machine
- For a top-loading washer: Pour the vinegar directly into the drum.
- For a front-loading washer: Add the vinegar to the detergent dispenser.
Run a Hot Cycle
- Set your washing machine to run a hot water cycle. If your machine has a “clean” cycle, use that setting.
Wipe Down the Interior
- After the cycle finishes, use a clean cloth to wipe down the interior of the drum, including around the door seal (for front loaders), to remove any remaining deposits.
Run a Rinse Cycle
- To ensure all vinegar and loosened deposits are rinsed away, run an additional rinse cycle with just water.
Clean the Dispenser
- Remove and clean the detergent dispenser (if applicable) to remove any buildup.
Dry the Machine
- Leave the washing machine door open for a few hours to allow it to dry completely and prevent mold growth.
By following these steps, you’ll help keep your washing machine free from mineral deposits and running smoothly.
Cleaning and Removing Mineral Deposits from the Toilet Bowl and Tank
Drain the water from the tank. If there are mineral deposits inside the tank, you’ll need enough white vinegar to fill to overflow tube (thankfully a gallon of vinegar does not cost loads). Let sit about 12 hours and put the cover back on. You can also fill the bowl with vinegar as well if mineral deposits are bad or you can soak paper towels in vinegar and place over deposit stains.
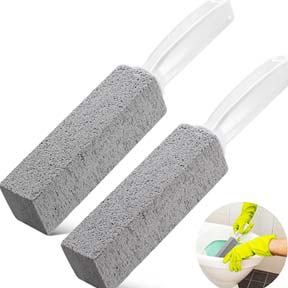
When time, scrub the tank and bowl. If you have extra stubborn stains, you can use a pumice stone. Just be sure to keep it wet at all times or it will scratch the surface. Do not use a pumice stone on colored toilets. Turn water back on and flush.
If the stains are particularly persistent, repeat the entire process. Eventually, removing those mineral deposits will get easier, especially if you stay on top of them before they have the chance to soak into your grout and tile.
Cleaning Mineral Deposits from a Glass Shower Door
Fill a spray bottle with white vinegar and a few drops of lemon juice (this will help keep the bathroom smelling a bit fresher). Next, wet the glass with the mixture, let sit a few minutes, use a plastic scrubby or a wet green scouring pad (like scotch-brite and keep it wet) then rinse. Repeat if needed.
How to Stop Mineral Deposits from Forming
One of the easiest ways to get rid of unsightly mineral deposits throughout your home is to prevent them in the first place. This can be done by filtering the water in your home before it reaches your faucets.
Install a home filtration system designed to remove minerals from your water at its source and notice how much easier cleaning your faucets sinks and other appliances suddenly become – plus your drinking water will taste a lot better!
More ways to prevent mineral deposits:
- Don’t let water dry on surfaces. We keep a washcloth handy for wiping down the faucets and showerhead after use. Wipe down other faucets with hand towels after use.
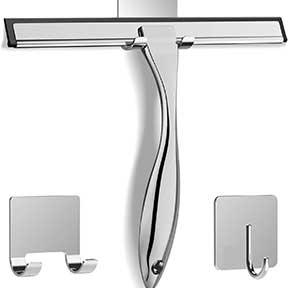
- Use a squeegee in the shower when done.
- Clean regularly.
To clean and remove mineral deposits it does take a little work, but the results are well worth the effort. So, get yourself some white vinegar (we always have plenty on hand), gloves and a few sponges and get to work!
Bathroom Cleaning
