Professional Dusting and Cleaning Tips
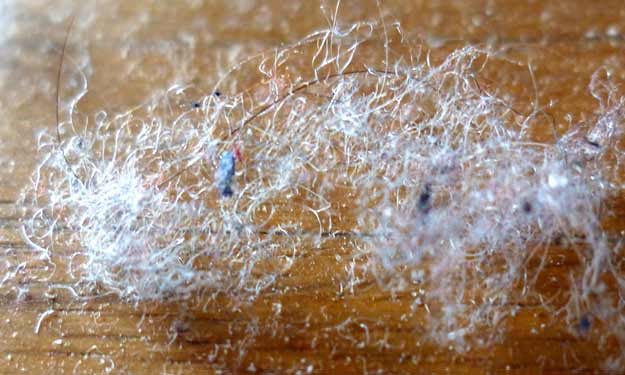
Dusting Tips from Professional House Cleaners.
Dust Your Home Like a Professional House Cleaner
I might be in the minority, but I enjoy dusting. I crank up the tunes to help me get going and get in my “dusting zone.” With the right mindset and a few professional dusting and cleaning tips, dusting doesn’t take very long, and everything feels cleaner once I’ve removed that hazy film that covers all the flat surfaces.
However, if dusting is not one of your priorities, consider this: the dust in your home is mostly dead skin cells (pet and human) that are constantly being sloughed off. In addition, dead insects, pollen, lint, and other particles can actually increase the chances that you or someone in your family will develop allergies.
Once you realize that dust isn’t just “innocent” flying lint, but is actually dead skin, it really changes your perspective. For me, that knowledge creates a whole new opinion on an acceptable level of dust (none!). Honestly, just the thought of it makes me feel a little squeamish as I’m writing this.
So, think of it this way: when you have an efficient technique, some great tunes, and understand the benefits of a dust-free home, with these professional dusting and cleaning tips, it no longer has to be a dreaded task.
Dusting Supplies to Keep on Hand
To begin with, keep your dusting supplies organized in a small tote. That way, everything you need is in one place, making it easy to grab and go.
Tools
- Dusting or cleaning rags: Terry cloth works great, or you can use microfiber cloths or mitts lightly dampened with water for better dust pickup.
- Duster for high spots: Ostrich feather dusters, lamb’s wool dusters, or microfiber dusters are all good options. Ostrich feathers can trap dust well, but some people prefer microfiber for its superior dust-grabbing ability. Skip synthetic feather dusters, as they tend to just scatter dust.
- Vacuum: A good vacuum with a HEPA filter is key for keeping dust inside the machine instead of floating back into your home. Without a HEPA filter, you’ll likely have to dust more frequently.
Handy Cleaning Supplies
- Furniture polish
- Glass or window cleaner
- Disinfectant spray or wipes
These supplies allow you to wipe down surfaces and remove dust completely, rather than just shuffling it around. If you prefer natural options, you can always make your own cleaners using the recipes below.
Homemade Furniture Polish
To start, this all-natural, inexpensive furniture polish helps make furniture shine while also repelling dust. Simply mix the ingredients in a spray bottle and you’re ready to go:
- 2 tablespoons lemon oil
- 2 cups mineral oil
Homemade Window Cleaner
Next, this homemade window cleaner will make your windows shine without leaving streaks. Mix the following ingredients in a spray bottle:
- 1 cup distilled white vinegar
- 1/4 cup non-sudsy ammonia
- 1 cup water
Although this window cleaning recipe is natural, it is still toxic. Be sure to label your spray bottle and keep it up and out of reach of children.
Homemade Disinfectant
Finally, this recipe works as a disinfectant, deodorizer, and bleach alternative without discoloring surfaces. Borax is also less expensive than many commercial disinfectants on the market.
- 1/2 cup borax
- 1 gallon of warm water
Borax is natural but can be toxic, so clearly label your spray bottle and keep it out of reach of children.
How to Dust Like a Professional Cleaner
If you want to dust like the pros do, it’s all about working efficiently and methodically from top to bottom. By following these steps, you’ll leave your home sparkling instead of simply moving dust from one place to another.
Start With a Tidy Room
Before you even lift a duster, take a few minutes to tidy up:
- Pick up clutter
- Shake out small rugs (do this outside to avoid resettling dust indoors)
- Fluff throw pillows
- Make the bed if you’re in a bedroom
A clean surface means less dust to chase and a smoother, faster clean.
Work From Top to Bottom
Since dust always settles downward, your cleaning should follow gravity:
- Start at the ceiling
- Remove cobwebs from corners
- Dust ceiling fans, light fixtures, and crown molding
This approach ensures you won’t have to re-clean surfaces below that you’ve already wiped down.
Use the Right Tools in the Right Places
Using the correct tools makes a noticeable difference:
- Feather duster or microfiber duster: Ideal for high or intricate areas such as lampshades, carved furniture, drawer fronts, and wall décor. Avoid using feather dusters on flat surfaces, as they tend to scatter dust instead of trapping it.
- Vacuum attachments: Use the upholstery or brush tool for blinds and drapes. Start at the top and work your way down. Vacuum these areas every few weeks to stay ahead of dust buildup.
Dust Lower Surfaces Thoroughly
Once the higher areas are complete, move to mid- and low-level surfaces:
- Lightly spray a microfiber cloth with your favorite dusting spray or homemade cleaner
- Wipe baseboards, stair rails, picture frames, and furniture surfaces
- Always pick up and move decorative objects instead of dusting around them
Clean as You Go
At the same time, dusting is a great opportunity to sanitize frequently used surfaces:
- Wipe down light switches, remote controls, phones, and tabletops
- Always spray your cloth, not the surface, especially when cleaning electronics or wood finishes
Shine Glass and Mirrors
To finish off the details:
- Use a streak-free glass cleaner and a clean microfiber or terry cloth
- Avoid paper towels, which tend to leave lint behind
- Polish mirrors, glass tabletops, and windows for a sparkling finish
Polish Wood Furniture
After dust is removed:
- Apply furniture polish to restore shine and add protection
- Use a soft, lint-free cloth
- Buff in the direction of the wood grain
Detail the Corners and Edges
Next, grab your vacuum’s crevice tool and clean along:
- Baseboards
- Floor trim
- Inside corners where pet hair, crumbs, and dust collect
These often-overlooked spots make a big difference in how clean a room looks.
Vacuum Last
With all the dust now on the floor, it’s time to vacuum:
- Start in the farthest corner of the room
- Vacuum toward the door using straight, overlapping passes
- Be sure to clean under furniture and along edges
Dusting like a pro doesn’t just make your home look clean, it also improves air quality and helps keep allergens under control.
How to Keep Your Home Dust Free
Get Rid of Clutter
The more clutter you have lying around, the easier it is for dust to build up. Box up unused items and donate them or hold a garage sale.
Replace Your Air Filters
Keeping air filters clean is a must since they trap dust circulating from your furnace or air conditioning system. When filters are clogged, they don’t remove dust effectively and make your system work harder. Regularly changing filters helps limit dust, allergens, and irritants.
Change Your Vacuum Bags
Finally, change vacuum bags frequently and keep extras on hand. A fresh bag allows your vacuum to remove dust particles more efficiently.
Professional Dusting and Cleaning Tips
At first, all of this may seem a bit overwhelming. However, after a couple of sessions, you’ll learn how to “work a room”. By following these tried-and-true professional dusting and cleaning tips, you’ll get results you can both see and smell.
Household Cleaners


Follow Us on Facebook